Pro T721 Thermostat: A Comprehensive Guide
This guide details the Pro T721 thermostat, covering installation, operation, and troubleshooting, referencing official manuals and datasheets for optimal performance and user experience.
The Pro T721 Thermostat represents a blend of simplicity and affordability in home climate control. Designed for reliability, this thermostat caters to a wide range of heating and cooling systems. It’s available in models TT-N-721 and T721, offering consistent performance across both.
This thermostat is intended for straightforward installation and operation, making it suitable for both DIY enthusiasts and professional installers. The quick reference guide emphasizes ease of use, while detailed manuals provide comprehensive instructions. Key features include accurate temperature control, programmable schedules, and user-friendly settings.
Understanding the basic functions and features outlined in the provided documentation will ensure optimal performance and longevity of your Pro T721 system. Proper installation, as detailed in the installation manual, is crucial for accurate readings.
Understanding the T721 Model Numbers (TT-N-721, T721)
The Pro T721 Thermostat is marketed under two primary model numbers: TT-N-721 and T721. While seemingly distinct, these designations largely represent variations in packaging or distribution channels. Functionally, both models offer identical performance capabilities and share the same core features, as outlined in the official manuals and datasheets.
The TT-N-721 often indicates a newer production run or specific retailer exclusive, potentially including updated packaging or bundled accessories. However, the internal components and operational characteristics remain consistent with the standard T721 model.
Users can confidently utilize the same installation manual and troubleshooting guides regardless of which model number is present on their device. Both are designed for simple, affordable climate control.

Installation Procedures
Proper installation ensures optimal performance. Refer to the detailed wiring diagrams and placement guidelines within the official Pro T721 installation manual.
Optimal Thermostat Placement (4-5 feet above floor)
Strategic placement is crucial for accurate temperature sensing with your Pro T721 thermostat. The official installation manual consistently recommends mounting the thermostat approximately 4 to 5 feet (1.2 to 1.5 meters) above the floor.
This height avoids localized temperature variations caused by floor-level cold drafts or heat rising from appliances. Avoid direct sunlight, drafts from doors or windows, and proximity to heat-generating sources like lamps or kitchen appliances.
Interior walls are generally preferred over exterior walls to minimize temperature fluctuations due to insulation differences. Ensure the thermostat is installed on an interior wall, away from obstructions that could impede airflow and affect readings. Proper placement contributes significantly to consistent and reliable climate control.
Wiring Diagrams for the T721
The Pro T721 thermostat supports standard 24V heating and cooling systems. Refer to the official installation manual for detailed wiring diagrams specific to your system configuration. Common wiring terminals include Rh, Rc, W, Y, G, and C.
Rh and Rc are typically for 24V power, W for heating, Y for cooling, and G for the fan. A “C” wire (common wire) is often required for consistent power and advanced features. Incorrect wiring can damage the thermostat or your HVAC system.
Always disconnect power to your HVAC system at the breaker before attempting any wiring. If you are uncomfortable with electrical work, consult a qualified HVAC technician. Diagrams in the manual illustrate various system types and corresponding wire connections for safe and effective installation.
Battery Installation and Replacement
The Pro T721 thermostat utilizes batteries as a primary or backup power source. Typically, two AA alkaline batteries are required for operation. Locate the battery compartment, usually accessed by removing a cover on the thermostat’s faceplate.
Ensure correct polarity when installing new batteries, matching the positive (+) and negative (-) markings. The thermostat may display a low battery icon when replacement is needed. Replace batteries promptly to avoid loss of functionality or settings.
Refer to the installation manual for specific battery type recommendations and compartment location. Proper battery disposal is crucial; follow local regulations for recycling alkaline batteries.

Operating Instructions
This section details how to effectively use your Pro T721 thermostat, including temperature adjustments, display interpretations, and schedule programming for optimal comfort.
Basic Operation: Setting Temperature
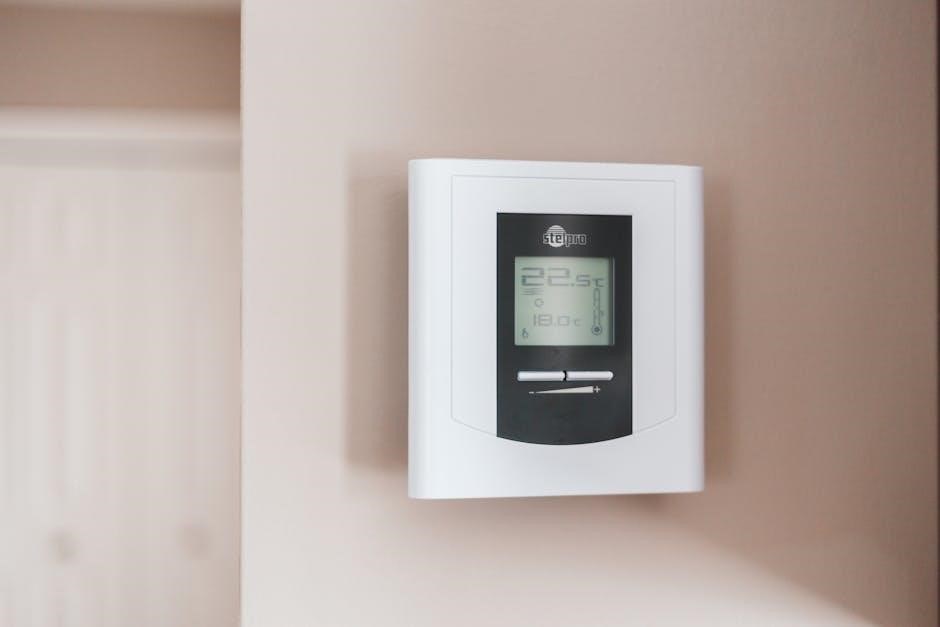
Adjusting the temperature on your Pro T721 thermostat is straightforward. Utilize the up and down arrow buttons, prominently located on the thermostat face, to increase or decrease the desired setpoint. The current room temperature is displayed centrally, allowing for easy comparison.
Pressing and holding these buttons will typically accelerate the temperature adjustment. The thermostat will then automatically activate your heating or cooling system to reach the selected temperature. Observe the display for system status indicators – heating, cooling, or idle.
Remember that the thermostat operates based on the programmed schedule, if one is active. Manual adjustments will temporarily override the schedule until the next scheduled change. For immediate comfort, this provides convenient control.
Understanding the Display Icons
The Pro T721 thermostat’s display utilizes several icons to convey system status and operational modes. A flame icon indicates the heating system is active, while a snowflake signifies cooling is engaged. A fan icon denotes the fan is running, and its appearance may vary depending on fan operation mode (auto or on).
A battery icon alerts you to low battery levels, prompting replacement. A Wi-Fi symbol, if applicable to your model, confirms a successful network connection. Other icons may indicate programmed hold status, filter change reminders, or system errors.
Consult the official installation manual for a complete and detailed explanation of each icon’s meaning, ensuring proper interpretation and efficient thermostat operation.
Programming Schedules: Setting Time and Days
The Pro T721 allows customized temperature schedules for each day of the week, optimizing comfort and energy savings. To program, access the schedule settings via the thermostat’s menu. Begin by setting the current time and date accurately.
Next, define time periods (e.g., Wake, Leave, Return, Sleep) and corresponding desired temperatures for each day. You can create unique schedules for weekdays and weekends, or copy settings across multiple days for convenience.
Refer to the official manual for detailed step-by-step instructions and specific button sequences. Proper scheduling maximizes efficiency and ensures a comfortable environment tailored to your lifestyle.
Advanced Features
Explore the Pro T721’s capabilities, including temporary/permanent holds, filter change reminders, and customizable backlight settings, detailed in the comprehensive installation manual.
Temporary and Permanent Hold Functions
The Pro T721 thermostat offers both Temporary and Permanent Hold functions for customized temperature control. A Temporary Hold allows you to set a desired temperature that will remain active until the next scheduled program period; This is ideal for short-term adjustments without disrupting your regular heating or cooling schedule.
To activate a Temporary Hold, simply adjust the temperature using the up or down buttons; the display will indicate “Hold” status. The thermostat will automatically revert to the programmed schedule at the next setpoint.
For longer-lasting adjustments, utilize the Permanent Hold function. This overrides the programmed schedule indefinitely, maintaining the selected temperature until manually changed. Access this feature through the thermostat’s menu, as detailed in the installation manual. Remember to consult the manual for specific button sequences and menu navigation.
Filter Change Reminders
The Pro T721 thermostat incorporates a helpful Filter Change Reminder feature, ensuring optimal HVAC system performance and air quality. Regularly replacing your air filter is crucial for maintaining efficiency and preventing potential damage to your heating and cooling equipment. The thermostat tracks operating time and prompts you when a filter change is recommended.
To enable or customize the reminder, navigate to the settings menu using the thermostat’s interface. You can typically adjust the reminder frequency (e.g., every 1, 3, or 6 months) based on your filter type and usage.

When the reminder activates, a visual indicator will appear on the display. Refer to the installation manual for specific icon details and reset instructions after completing the filter replacement. Ignoring this reminder can lead to reduced airflow and increased energy consumption.
Backlight Control and Settings
The Pro T721 thermostat features an adjustable backlight for enhanced visibility in low-light conditions. This setting allows you to customize the display’s brightness and duration, optimizing both readability and energy conservation. Access the backlight settings through the thermostat’s menu system, typically found within the ‘Display’ or ‘Settings’ options.
You can usually adjust the brightness level to suit your preference, ranging from off to maximum intensity. Additionally, the thermostat often offers options to control the backlight’s timeout period – the length of time the backlight remains illuminated after the last button press.
Refer to the installation manual for specific instructions on navigating the menu and configuring these settings. Proper backlight adjustment can significantly improve usability and extend battery life.
Troubleshooting Common Issues
This section addresses frequent problems with the Pro T721 thermostat, including power failures, inaccurate readings, and connectivity issues, referencing the manual.
Thermostat Not Powering On
If your Pro T721 thermostat fails to power on, begin by verifying the battery installation. Ensure the batteries are fresh and correctly inserted, observing the proper polarity as indicated inside the battery compartment. Refer to the installation manual for a diagram.
Next, check the wiring connections. Confirm that the wires are securely connected to the correct terminals on the thermostat base. A loose connection can prevent power from reaching the unit. If the thermostat is hardwired, verify the power supply to the system is active.
Consult the datasheet to confirm voltage requirements. If issues persist, a faulty thermostat or a problem with the HVAC system’s power source may be the cause; professional assistance is recommended.
Inaccurate Temperature Readings
If the Pro T721 thermostat displays inaccurate temperature readings, several factors could be at play. First, ensure the thermostat isn’t directly exposed to sunlight, drafts, or heat-generating appliances, as these can skew the readings. Optimal placement, 4-5 feet above the floor, is crucial – see the installation manual.
Verify the thermostat is calibrated correctly. Some models allow for temperature offset adjustments within the settings menu. Consult the applications guide for specific instructions. A dirty or obstructed temperature sensor can also cause inaccuracies; gently clean the area around the sensor.
If the problem continues, a faulty sensor may require professional replacement. Refer to the technical specifications for acceptable temperature ranges.
Connectivity Problems (If Applicable)
If your Pro T721 thermostat model features connectivity (Wi-Fi or other protocols), troubleshooting connection issues is essential. First, confirm your home network is functioning correctly and the thermostat is within range of the router. Refer to the installation manual for specific network requirements and supported protocols.
Check the thermostat’s settings menu to ensure the correct network credentials have been entered. A simple reboot of both the thermostat and your router can often resolve temporary connectivity glitches. Consult the datasheets for troubleshooting steps related to signal interference.
If problems persist, review the applications guide for advanced network configuration options or contact technical support.
Manual Resources & Documentation
Access official installation manuals, technical datasheets, and comprehensive applications guides for the Pro T721 thermostat to ensure proper setup and operation.
Locating the Official Installation Manual
Finding the official installation manual for your Pro T721 thermostat is crucial for a successful and safe setup. Several online resources provide access to this vital documentation. Begin by searching the manufacturer’s official website; typically, a dedicated “Support” or “Downloads” section houses manuals for all current and past products.
Look for documents specifically labeled “Installation Manual” or “User Guide” for the T721 model, including variations like TT-N-721. Many HVAC distributors also host downloadable manuals on their websites. A general web search using keywords like “Pro T721 thermostat manual PDF” will yield numerous results, but prioritize links from reputable sources.
Ensure the manual corresponds to your specific thermostat model number to avoid compatibility issues. The manual contains detailed wiring diagrams, safety precautions, and step-by-step instructions essential for proper installation.
Datasheets and Technical Specifications
Accessing the Pro T721 thermostat’s datasheets provides in-depth technical details beyond the installation manual. These documents outline precise specifications, including voltage requirements, temperature range, wiring configurations, and compatibility with various HVAC systems. Datasheets are invaluable for professional installers and those seeking a comprehensive understanding of the thermostat’s capabilities.
Key specifications often include dimensions, display characteristics, communication protocols (if applicable), and environmental operating conditions. Look for datasheets on the manufacturer’s website, often found within the “Technical Resources” or “Engineering Support” sections.
These documents ensure proper system integration and help troubleshoot complex issues. They detail the differences between models like TT-N-721 and T721, clarifying specific features and limitations. Always refer to the latest revision of the datasheet for the most accurate information.
Applications Guide for the T721
The Pro T721 thermostat is designed for a wide range of residential and light commercial HVAC applications. This guide clarifies suitable uses, ensuring optimal performance and energy efficiency. It’s ideal for single-stage and multi-stage heating and cooling systems, including furnaces, air conditioners, and heat pumps.
The T721 excels in standard residential settings, offering reliable temperature control and programmable schedules. It’s also applicable in smaller commercial spaces like offices or retail units with conventional HVAC setups.
Consider the system’s voltage and wiring compatibility before installation. The applications guide details limitations, such as incompatibility with certain proprietary systems. Proper application guarantees longevity and avoids operational issues, referencing the installation manual for detailed wiring instructions.

Safety Precautions
Always disconnect power before wiring. Handle batteries responsibly, avoiding damage or improper disposal, and consult the manual for electrical safety guidelines.
Electrical Safety Guidelines
Prior to any installation or maintenance work on the Pro T721 thermostat, completely disconnect the power supply at the breaker box or fuse panel. This crucial step prevents electrical shock and potential damage to the thermostat or your home’s electrical system.
Never attempt to repair the thermostat yourself; internal components are complex and potentially hazardous. If you suspect a malfunction, contact a qualified HVAC technician. Ensure all wiring connections are secure and conform to local electrical codes.
Avoid exposing the thermostat to water or excessive moisture. Do not install the thermostat in areas where it could come into contact with flammable materials. Always refer to the official installation manual for detailed electrical specifications and safety instructions specific to the T721 model.
Proper Disposal of Batteries
The Pro T721 thermostat utilizes batteries for backup and operational functions. When replacing batteries, it’s vital to dispose of the old ones responsibly, adhering to environmental regulations. Do not discard batteries with general household waste. Batteries contain potentially harmful materials that can contaminate the environment.
Instead, locate a designated battery recycling drop-off point in your community. Many retailers that sell batteries also offer recycling services. Check with your local waste management authority for specific disposal guidelines.
Proper battery disposal protects ecosystems and human health. Refer to the official Pro T721 manual for the correct battery type and any specific disposal recommendations from the manufacturer.
Warranty Information
The Pro T721 thermostat is covered by a limited warranty against manufacturing defects. Details regarding coverage duration and the claim process are in the manual.
Coverage Details and Claim Process
The Pro T721 thermostat warranty typically covers defects in materials and workmanship for a period of one year from the date of original purchase. This warranty does not cover damage resulting from improper installation, misuse, abuse, or normal wear and tear. To initiate a warranty claim, retain your proof of purchase and contact the manufacturer’s customer support.
You will likely need to provide the model number (TT-N-721 or T721), date of purchase, and a detailed description of the defect. The manufacturer may request photographic or video evidence. If the claim is approved, you will receive a replacement unit or a refund, at the manufacturer’s discretion. Shipping costs for returns may be the responsibility of the customer. Refer to the official installation manual for complete warranty terms.