
Crosley Record Player Instruction Manual: A Comprehensive Guide
Welcome! This detailed guide provides essential instructions for your Crosley turntable‚ covering setup‚ operation‚ Bluetooth pairing‚ and crucial maintenance procedures․
Crosley has a rich history of bringing music enjoyment to generations‚ evolving from radio manufacturing to becoming a beloved name in record players․ These turntables blend classic aesthetics with modern technology‚ offering a user-friendly experience for both vinyl newcomers and seasoned audiophiles․
This instruction manual is designed to help you unlock the full potential of your Crosley record player․ Whether you’re rediscovering your vinyl collection or starting a new one‚ understanding your turntable’s features and proper operation is key․ We’ll guide you through every step‚ from initial setup and connecting to audio‚ to playing records and maintaining your investment for years of listening pleasure․
Understanding Your Crosley Model
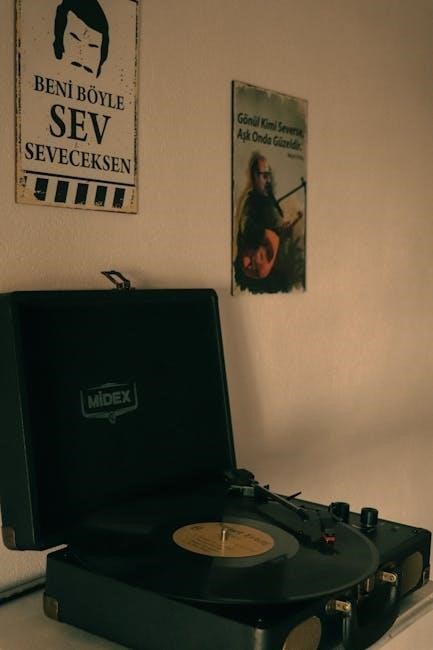
Crosley offers a diverse range of record players‚ each with unique features tailored to different preferences․ Some models‚ like the CR8005D/CR8005‚ boast Bluetooth connectivity for wireless audio streaming‚ while others focus on a more traditional‚ fully manual experience․ Understanding your specific model is crucial for optimal performance;
Before you begin‚ familiarize yourself with the key differences between automatic and manual operation․ Automatic players handle the tonearm movement‚ while manual players require you to control it․ This manual applies generally‚ but always refer to model-specific details for precise instructions․ Identifying your model number will help you find dedicated support and resources online․
Unboxing and Initial Setup
Carefully unpack your Crosley record player and all included accessories․ Verify that all components listed in the packaging are present․ Gently remove any protective packaging materials․ Place the turntable on a stable‚ level surface‚ away from direct sunlight‚ heat sources‚ and excessive dust․
Before connecting to power‚ inspect the turntable for any visible damage․ Ensure the platter is properly seated on the spindle․ Avoid forcing any parts during assembly․ Initial setup involves connecting the necessary cables (power and audio output – see section 5) before powering on the unit for the first time․
Component Identification
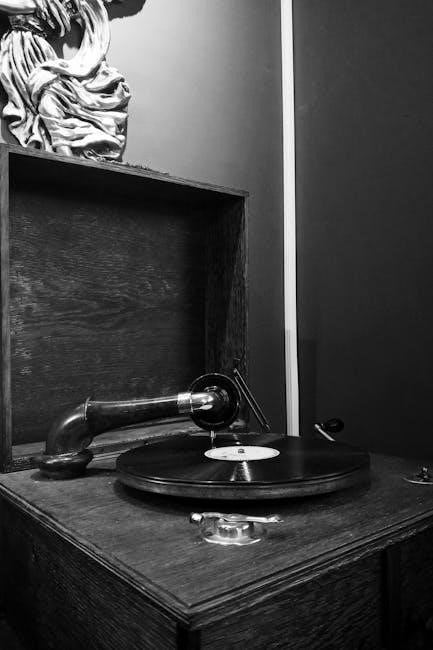
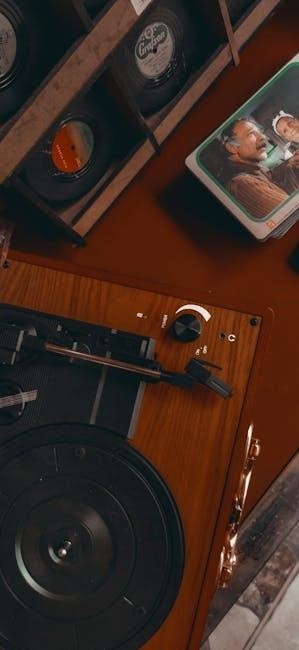
Familiarize yourself with the key components of your Crosley record player․ This includes the Turntable Platter‚ where vinyl records are placed for playback․ The Tonearm‚ equipped with a Cartridge and stylus‚ reads the grooves of the record․ Locate the Control Knobs and Buttons‚ which manage power‚ speed‚ and volume․
Identify the power input‚ RCA audio outputs for wired speaker connections‚ and any Bluetooth pairing indicators․ Understanding the function of each component is crucial for proper operation and maintenance․ Refer to the diagrams within this manual for visual assistance in locating each part of your Crosley turntable․
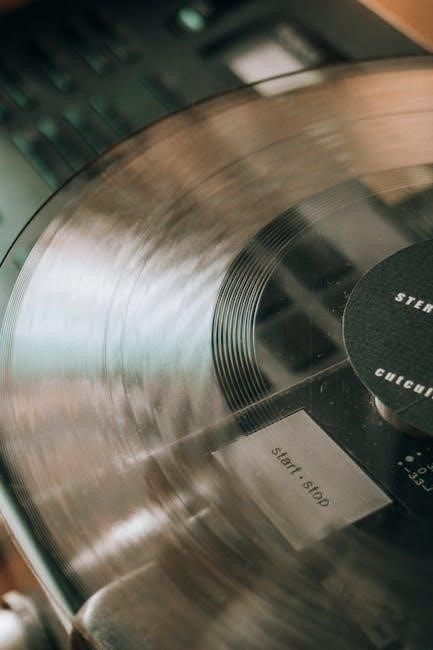
Turntable Platter
The Turntable Platter is the circular platform upon which your vinyl records rest during playback․ Ensure it is clean and free of debris before each use to prevent damage to your records and maintain optimal sound quality; The platter spins at specific speeds – typically 33 ⅓‚ 45‚ and sometimes 78 RPM – selected via control knobs․
Carefully place your record onto the platter‚ centering it on the spindle․ Avoid applying excessive force․ Some models feature a removable platter; consult your model’s specific instructions for removal and re-installation․ Regular cleaning with a soft‚ dry cloth will preserve the platter’s surface and ensure smooth record rotation․
Tonearm and Cartridge
The Tonearm holds the cartridge and guides it across the record’s grooves․ Handle it with extreme care to avoid damage․ At the end of the tonearm is the Cartridge‚ which houses the stylus (needle) – the component that actually reads the music encoded in the vinyl․
The cue lever gently raises and lowers the tonearm‚ preventing accidental stylus damage․ Some models allow tracking force adjustment‚ influencing the pressure the stylus applies to the record․ Proper alignment and tracking force are crucial for optimal sound and preventing record wear․ Regularly inspect the stylus for wear and replace it as needed․
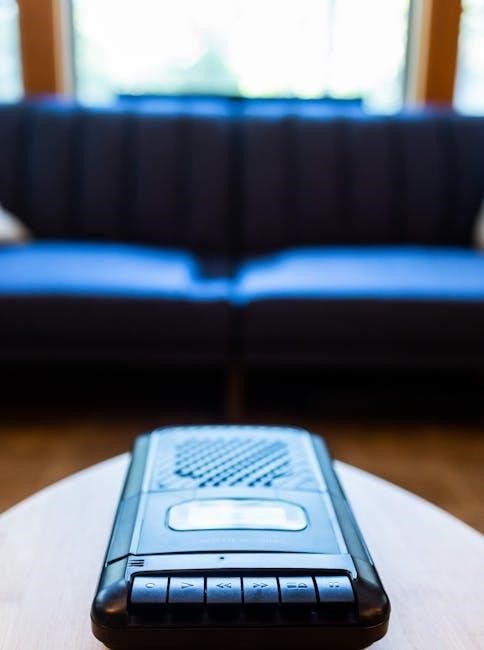
Control Knobs and Buttons
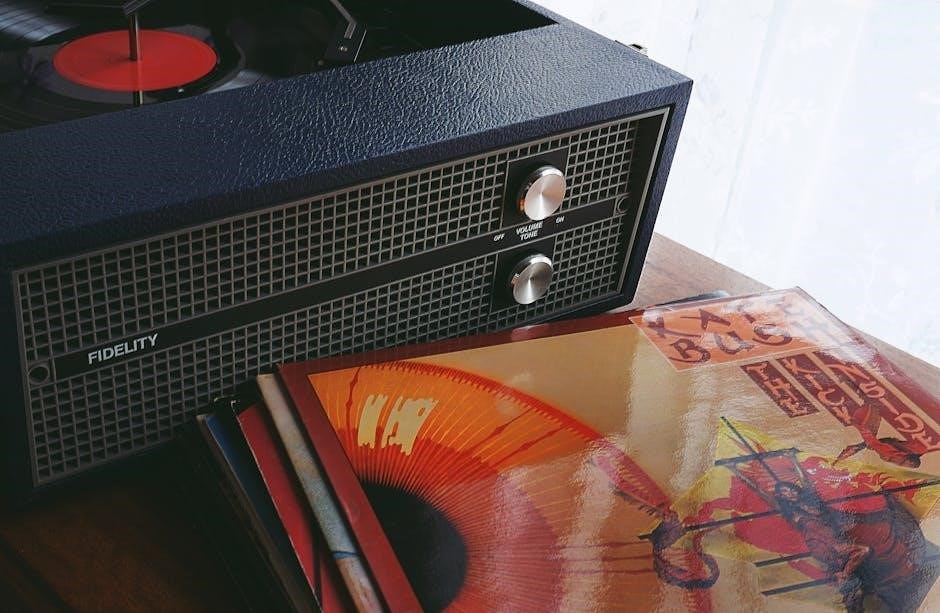
Your Crosley record player features several control knobs and buttons for operation․ The Power Switch turns the unit on and off․ The Speed Selector allows you to choose the correct playback speed (33 ⅓‚ 45‚ or 78 RPM) based on your record type․ A Volume Knob adjusts the audio output level․
The Cue Lever raises and lowers the tonearm․ Some models include a Function Switch to select between record play‚ Bluetooth‚ and auxiliary input․ Buttons may control Bluetooth pairing and playback․ Familiarize yourself with each control’s function for seamless operation and optimal listening enjoyment․
Connecting to Power and Audio Output
Before enjoying your Crosley record player‚ proper connection is essential․ First‚ connect the provided power adapter to the unit and a suitable power outlet to Power On the record player․ For audio‚ you have options․ You can connect to external speakers using RCA cables – red for right‚ white for left – ensuring a secure connection․
Alternatively‚ utilize the built-in Bluetooth Pairing Instructions; Enable Bluetooth on your device‚ search for “Crosley‚” and connect․ Ensure successful pairing for wireless audio transmission․ Always verify all connections before playback to avoid issues․
Powering On the Record Player
To initiate operation‚ locate the power input on the rear panel of your Crosley record player․ Connect the supplied power adapter firmly into this port and then plug the adapter into a functioning electrical outlet․ Some models feature a power switch; ensure it’s toggled to the ‘ON’ position․
Observe the unit for a power indicator light‚ confirming successful power-up․ If no light appears‚ double-check the adapter connection and outlet functionality․ In rare instances‚ a switch on the underside might need to be set to ‘ON’ – consult your specific model’s diagrams․
Connecting to Speakers (Wired)
For wired audio‚ locate the RCA output jacks on the rear of your Crosley record player․ These are typically red (right channel) and white (left channel)․ Connect corresponding RCA cables from these jacks to the input jacks on your powered speakers or amplifier․
Ensure a secure connection for optimal sound quality․ If using an amplifier‚ power on the amplifier and adjust the volume to a moderate level․ Select the appropriate input source on your amplifier that corresponds to the RCA connection․ Verify sound output by starting a record – adjust volume as needed․
Bluetooth Pairing Instructions
To connect wirelessly‚ activate Bluetooth mode on your Crosley record player․ For models like the CR8005D/CR8005‚ the unit will become discoverable as “Crosley․” On your smartphone or tablet‚ navigate to Bluetooth settings and search for available devices․ Select “Crosley” from the list to initiate pairing․
A successful connection is usually indicated by an audible tone or a visual confirmation on the record player․ Once paired‚ you can stream audio from your device․ If pairing fails‚ ensure no other devices are connected and repeat the process․ Enjoy wireless listening!
Playing Vinyl Records
Begin by carefully placing your vinyl record onto the turntable platter‚ ensuring it’s centered for optimal playback; Gently use the cue lever (25) to lift the tonearm and position the stylus just above the record’s edge․ Lower the tonearm using the cue lever to start the music․
For uninterrupted listening‚ avoid touching the tonearm during play․ If needed‚ the cue lever allows you to lift and reposition the stylus without damaging the record․ Remember to handle records with care‚ avoiding fingerprints on the playing surface for the best audio quality․
Placing a Record on the Turntable
To begin enjoying your vinyl collection‚ gently place a record onto the turntable platter․ Ensure the record is centered on the spindle to prevent skipping or distortion during playback․ Avoid touching the grooved surface; handle the record by its edges or label․
Before lowering the tonearm‚ visually inspect the record for any dust or debris․ A clean record ensures optimal sound quality and minimizes wear on your stylus․ Proper placement is crucial for a seamless listening experience‚ allowing the turntable to accurately track the record’s grooves․
Using the Cue Lever
The cue lever is a vital control for gently raising and lowering the tonearm onto the record․ Before dropping the needle‚ lift the cue lever to raise the tonearm clear of the record surface․ This prevents accidental stylus damage․ Carefully position the tonearm over the desired track’s starting point․
Slowly lower the cue lever to gently descend the stylus onto the record․ This minimizes wear and tear on both the record and the stylus․ Utilize the cue lever for precise track selection and to avoid abrupt needle drops‚ ensuring a smooth and enjoyable listening experience every time․
Adjusting the Tracking Force (If Applicable)
Some Crosley models feature adjustable tracking force‚ crucial for optimal sound and record preservation․ Tracking force dictates the downward pressure of the stylus on the record groove․ Incorrect force can cause distortion or damage․ Consult your specific model’s documentation to determine if adjustment is possible․
If adjustable‚ use a stylus force gauge to accurately measure and set the recommended tracking force‚ typically specified by the cartridge manufacturer․ Lighter force may cause skipping‚ while excessive force accelerates record wear․ Precise adjustment ensures clear audio reproduction and extends the lifespan of your vinyl collection․
Bluetooth Functionality
Many Crosley record players offer Bluetooth connectivity‚ enabling wireless audio streaming to speakers or headphones․ To initiate pairing‚ activate Bluetooth mode on your record player – typically indicated by a flashing light․ Then‚ on your external device‚ search for available Bluetooth devices․ You should find options like “Crosley CR8005D” or “Crosley CR8005”․
Select the appropriate Crosley identifier to establish a connection․ Successful pairing is usually confirmed by a solid light or an audible tone․ Once connected‚ enjoy seamless wireless audio playback from your record player․ Remember to consult your model’s specific instructions for detailed pairing steps․
Pairing with Devices (CR8005D/CR8005)
For CR8005D or CR8005 models‚ begin by ensuring your audio device’s Bluetooth is enabled and discoverable․ Activate Bluetooth on the Crosley unit; a flashing indicator confirms pairing mode․ Search for available devices on your phone‚ tablet‚ or computer․ Locate and select “Crosley” or the specific model number (CR8005D/CR8005) from the list․
If prompted‚ enter the pairing code “0000”․ A successful connection is typically signaled by a solid Bluetooth indicator on the record player and confirmation on your device․ Now‚ you can stream audio wirelessly․ Should pairing fail‚ try restarting both devices and repeating the process․
Troubleshooting Bluetooth Connection Issues
Experiencing Bluetooth difficulties? First‚ verify Bluetooth is enabled on both your Crosley record player and your audio device․ Ensure devices are within a reasonable range (typically 30 feet)․ If pairing fails‚ “forget” or unpair the Crosley unit from your device’s Bluetooth settings and re-attempt the pairing process․
Interference from other wireless devices can also cause issues․ Try moving away from potential sources of interference․ Restarting both the record player and your device often resolves connectivity problems․ Confirm the volume is appropriately adjusted on both sides․ If problems persist‚ consult the full instruction manual for further assistance․
Automatic vs․ Manual Operation
Crosley record players offer both automatic and manual operation modes‚ catering to diverse preferences․ Automatic players initiate playback upon power-on or button press‚ simplifying the listening experience․ Manual turntables require the user to manually position the tonearm onto the record’s surface to begin playback‚ offering greater control․
Some models feature a switch to toggle between these modes․ In automatic mode‚ the turntable may stop at the record’s end․ Manual operation allows continuous playback of multiple records․ Understanding your model’s specific features is crucial for optimal performance and enjoyment of your vinyl collection․
Record Player Maintenance
Regular maintenance ensures optimal performance and extends the lifespan of your Crosley record player․ Cleaning the turntable platter with a soft‚ dry cloth removes dust and debris․ The stylus/needle requires careful cleaning using a stylus brush‚ gently removing dust after each use to prevent damage and maintain sound quality․
The dust cover should be cleaned with a mild plastic cleaner․ Avoid harsh chemicals․ Proper care prevents scratches and keeps your turntable looking its best․ Consistent cleaning habits contribute to a superior listening experience and protect your investment in vinyl playback․
Cleaning the Turntable Platter
Maintaining a clean turntable platter is crucial for optimal record playback․ Regularly remove dust and debris using a soft‚ lint-free cloth․ Avoid abrasive cleaners or harsh chemicals‚ as these can damage the platter’s surface․ Gently wipe in a circular motion‚ following the grooves‚ to effectively lift away particles․
For stubborn residue‚ slightly dampen the cloth with distilled water‚ ensuring it’s not overly wet․ Always dry the platter thoroughly before placing a record․ A clean platter minimizes static and ensures the record glides smoothly‚ preserving both the vinyl and the sound quality․
Cleaning the Stylus/Needle
Regular stylus cleaning is vital for preserving sound quality and extending record life․ Dust and debris accumulate on the needle‚ causing distortion and potential damage to your vinyl․ Use a stylus brush‚ moving it from back to front – never side to side or inward – to avoid bending the cantilever․
Stylus cleaning solutions are also available‚ but use them sparingly and follow the product instructions carefully․ Avoid touching the stylus with your fingers․ A clean stylus ensures accurate tracking‚ minimizing wear on your records and delivering optimal audio performance․ Inspect regularly for buildup!
Dust Cover Care
Protect your Crosley record player and your vinyl collection with proper dust cover maintenance․ Regularly wipe the dust cover with a soft‚ lint-free cloth to remove dust and fingerprints․ Avoid using abrasive cleaners or solvents‚ as these can damage the surface and cause scratches․
For stubborn marks‚ a slightly dampened cloth with mild soapy water can be used‚ followed by a dry cloth to polish․ Handle the dust cover carefully to prevent accidental drops or impacts․ A clean dust cover not only preserves the aesthetic appeal of your turntable but also safeguards its internal components․
Troubleshooting Common Issues
Encountering problems? Here’s a quick guide․ Record Skips or Jumps: Ensure the turntable is on a level surface․ Clean the record and stylus․ Adjust tracking force if applicable․ No Sound Output: Verify speaker connections and volume levels․ Check Bluetooth pairing if using wireless speakers․ Confirm the record player is powered on correctly․
Turntable Stops Mid-Play: Some models have an auto-stop feature; switch it off if desired․ Inspect the drive belt for wear or breakage․ If issues persist‚ consult the warranty information or seek professional assistance․ Remember to always disconnect the power before attempting any internal repairs․
Record Skips or Jumps
If your record is skipping or jumping‚ several factors could be at play․ First‚ ensure the turntable is placed on a perfectly level surface to prevent uneven tracking․ Clean both the vinyl record and the stylus thoroughly‚ as dust and debris are common culprits․ For models with adjustable tracking force‚ carefully adjust it according to the record’s specifications․
Also‚ inspect the record for scratches or damage․ A warped record can also cause skipping․ If the problem continues‚ try a different record to isolate the issue․ Finally‚ ensure the anti-skate setting is appropriately adjusted for optimal playback․
No Sound Output
Experiencing no sound? First‚ verify the power connection to both the turntable and your speakers․ Confirm the volume is turned up on both the record player and the connected audio system․ If using RCA cables‚ ensure they are securely plugged into the correct inputs on both devices․
When utilizing Bluetooth‚ double-check the pairing and ensure the audio source on your device is set to the Crosley turntable․ Some models have a switch to select between phono and line output – verify the correct setting is chosen․ Finally‚ test with a different record and audio cable to isolate the problem․
Turntable Stops Mid-Play
If your Crosley turntable halts during record playback‚ several factors could be at play․ First‚ ensure the auto-stop function isn’t activated; some models feature a switch to turn this off․ Check for dust or debris on the record surface‚ as this can cause the needle to skip and stop․ A worn or damaged stylus can also contribute to this issue‚ requiring replacement․
Additionally‚ verify the tracking force (if adjustable on your model) is correctly set․ In rare cases‚ setting the switch to the ‘OFF’ position can resolve the issue․ Finally‚ inspect the drive belt for wear or breakage‚ as this is crucial for consistent rotation․
Replacing the Stylus/Needle
Regular stylus replacement is vital for optimal sound quality and preventing record damage․ Gently remove the stylus guard‚ if present․ Using a small‚ pointed tool (like tweezers)‚ carefully unclip the old stylus from the cartridge․ Avoid pulling directly on the cantilever (the thin rod holding the needle)․
Align the new stylus with the cartridge slot and gently push it into place until it clicks․ Ensure it’s securely fastened․ Reattach the stylus guard․ Always handle the stylus with care to avoid damage․ A damaged stylus can ruin your vinyl records!
Safety Precautions
To ensure safe operation‚ always disconnect the record player from the power source before cleaning or performing maintenance․ Avoid exposing the unit to excessive moisture or extreme temperatures․ Never attempt to disassemble or repair the internal components yourself; refer servicing to qualified personnel․
Keep the record player out of reach of children․ Do not operate the turntable near flammable materials․ Ensure proper ventilation around the unit to prevent overheating․ Handle records carefully to avoid scratches and damage․ Always use a grounded power outlet․
Warranty Information
Your Crosley record player is warranted against defects in materials and workmanship for a period of one year from the date of original purchase․ This warranty covers parts and labor necessary to correct defects arising from normal use․ The warranty does not cover damage resulting from misuse‚ abuse‚ accidents‚ or unauthorized modifications․
To obtain warranty service‚ please contact Crosley customer support with proof of purchase․ Shipping costs to and from the service center are the responsibility of the customer․ This warranty gives you specific legal rights‚ and you may have other rights which vary by location․
Frequently Asked Questions (FAQ)
Q: Why is there a humming sound? A: Ensure proper grounding and check speaker connections․ Q: My turntable stops mid-play․ A: Switch the automatic stop function off․ Q: Bluetooth isn’t connecting․ A: Verify Bluetooth is enabled on both devices and try re-pairing․ Q: How often should I replace the stylus? A: Every 50-100 hours of playback for optimal sound quality․
Q: Can I connect headphones? A: Yes‚ using the RCA output or Bluetooth․ For further assistance‚ consult the full instruction manual or contact customer support․
Where to Find Additional Support & Manuals
For comprehensive assistance‚ visit the official Crosley Audio website․ There‚ you’ll discover a dedicated support section featuring downloadable instruction manuals for various turntable models‚ including the E100A Elite Series․ You can also browse a frequently asked questions database addressing common issues․
Additionally‚ online forums and communities dedicated to Crosley turntables offer valuable peer-to-peer support․ Customer service can be reached via email or phone‚ details available on their website․ Remember to have your model number ready when contacting support․